Install Apache Server
If you don't have an Apache Server, the first step is to install it.
1.Go to the Apache website.
2.Choose the version of Apache that matches your Windows system:
•If you have a 64-bit system, download the file with win64 in its name, for example: httpd-2.4.xx-win64-VS17.zip
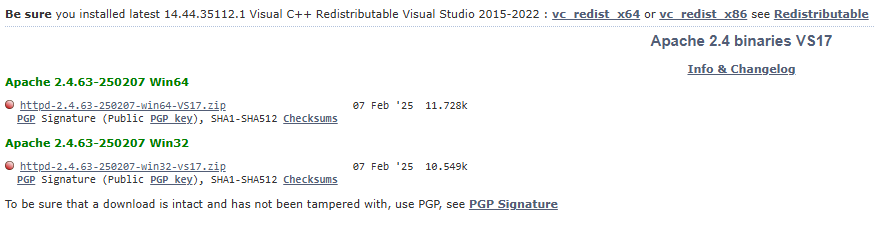
3.Make sure you have Visual C++ Redistributable for Visual Studio 2015–2022 installed. If not, download and install it from the same site.

4.Extract the Apache24 folder from the downloaded ZIP archive into C:\.
Now Apache is ready for configuration.
Configuration
Set the server name
1.Open the file httpd.conf located at C:\Apache24\conf\httpd.conf
2.In the httpd.conf file, find the line:
#ServerName www.example.com:80
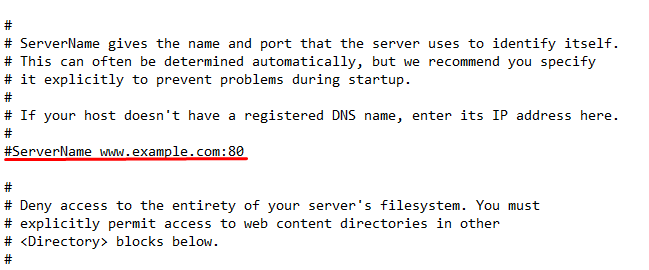
3.Remove the # and change it to:
ServerName localhost:80

This removes the warning about the missing server name when Apache starts.
Save the changes in httpd.conf.
Starting Apache as a console application
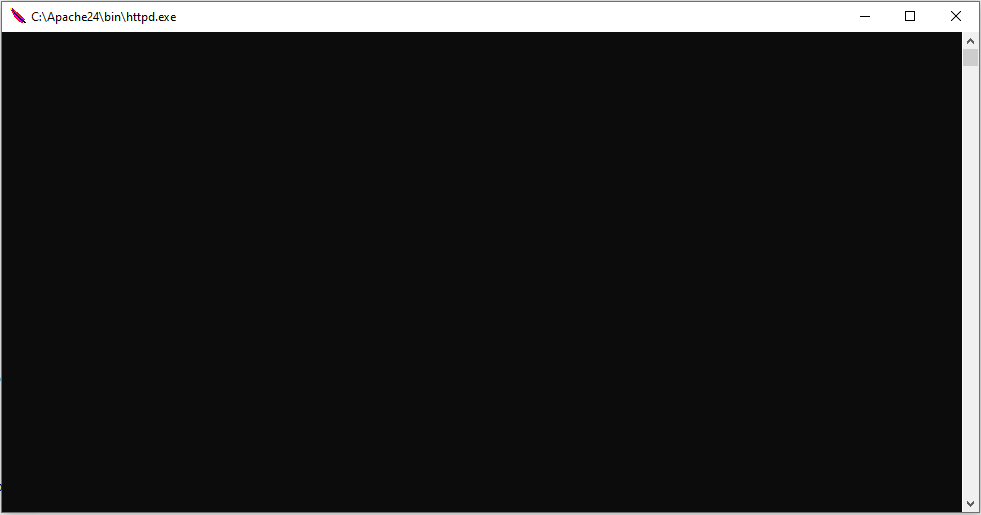
1.Navigate to the C:\Apache24\bin directory
2.Run the httpd.exe executable located in this folder

3.A console window will open. Do not close it while you are working with the web application.
4.Open your browser and go to: http://127.0.0.1/
If everything works correctly, you will see the default Apache page with the text “It works!”.
