Installing Node.js
To create a React application, you first need to download and install Node.js from the official website.
Make sure to install the version appropriate for your operating system and leave all installation settings as default. Node.js is required for React development, including project building and dependency management.
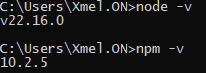
To verify that Node.js and npm were installed successfully, open CMD or PowerShell and run the following commands:
node -v
npm -v
Install Vue CLI
Enter the following command:
npm install -g @vue/cli
Once the installation starts, it may take a short time to complete.
After it finishes, you can check the installed version with:
vue --version

Create a New Project
Now run the following command to create a new Vue project (e.g., guess-game-vue):
vue create guess-game-vue
This will start the Vue project setup process in your terminal:
1.For our task, it’s enough to choose the default configuration:
•Default ([Vue 3] babel, eslint) — just press Enter when prompted.

2.Next, you'll be asked to choose a package manager.
•Select the option: Use NPM

3.The CLI will then install the necessary dependencies. This may take 1–2 minutes.
When complete, you should see a success message indicating that the project is ready.

Start the Local Development Server
Navigate into your project directory (e.g., guess-game-vue):
cd guess-game-vue
Then start the local development server:
npm run serve
If everything is correct, the application will be available in your browser at http://localhost:8080/.
You should see the default Vue welcome page.

To stop the development server at any time, press Ctrl + C and then Y to confirm.
Open the Project and Find the Application Code
To explore and edit the source files, open the project folder in File Explorer by running:
explorer .
Now you have access to the full project structure.

Navigate to the src folder, where you will see all the source files of the project.
