This section demonstrates how to create a task management web application using Vue. The app allows users to add new tasks and move them between three states: To Do, In Progress, and Done.
Before building the application, ensure that a Vue project is properly set up.
Editing App.vue
Once your Vue project is set up, all application logic and layout will be defined in the App.vue file.
Replace the contents of App.vue with the following code.
<template>
<!-- Top-level container with horizontal layout and spacing -->
<div style="display: flex; gap: 20px">
<!-- To Do Column -->
<div>
<h3>To Do</h3>
<!-- Toggle between "Add Task" button and input field -->
<div v-if="!showInput">
<button @click="showInput = true">Add Task +</button>
</div>
<div v-else>
<!-- Input field bound to newTask -->
<input v-model="newTask" placeholder="Task name" />
<button @click="addTask">Save</button>
</div>
<!-- Display list of To Do tasks -->
<div
v-for="(task, i) in tasks.todo"
:key="'todo-' + i"
style="display: flex"
>
{{ task }}
<!-- Move task to In Progress -->
<button @click="moveTask(task, 'todo', 'inprogress')">→</button>
</div>
</div>
<!-- In Progress Column -->
<div>
<h3>In Progress</h3>
<div
v-for="(task, i) in tasks.inprogress"
:key="'inprogress-' + i"
style="display: flex"
>
<!-- Move task back to To Do -->
<button @click="moveTask(task, 'inprogress', 'todo')">←</button>
{{ task }}
<!-- Move task to Done -->
<button @click="moveTask(task, 'inprogress', 'done')">→</button>
</div>
</div>
<!-- Done Column -->
<div>
<h3>Done</h3>
<div
v-for="(task, i) in tasks.done"
:key="'done-' + i"
style="display: flex"
>
<!-- Move task back to In Progress -->
<button @click="moveTask(task, 'done', 'inprogress')">←</button>
{{ task }}
</div>
</div>
</div>
</template>
<script setup>
// Import Vue composition API functions
import { reactive, ref } from 'vue'
// Reactive state object with three task categories
const tasks = reactive({
todo: [],
inprogress: [],
done: []
})
// Text input value for a new task
const newTask = ref('')
// Controls visibility of the input field
const showInput = ref(false)
// Adds a new task to the "To Do" list
function addTask() {
const task = newTask.value.trim()
if (!task) return
tasks.todo.push(task)
newTask.value = ''
showInput.value = false
}
// Moves a task from one list to another
function moveTask(task, from, to) {
if (from === to) return
const fromList = tasks[from]
const toList = tasks[to]
const index = fromList.indexOf(task)
if (index !== -1) {
fromList.splice(index, 1) // Remove from source
toList.push(task) // Add to target
}
}
</script>
The template, script, and styles are combined in one file, using Vue’s <script setup> syntax for simplicity and clarity.
Running the Application
Navigate to your project directory in the terminal and run the following command:
npm run serve
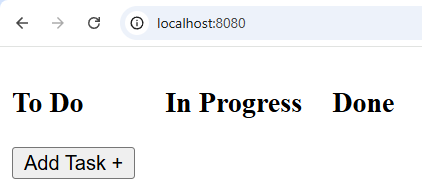
Once the server starts successfully, the application will be available at http://localhost:8080/.
Open this URL in your browser to view the fully functional To Do web application.
See also